> ## Documentation Index
> Fetch the complete documentation index at: https://docs.duitpos.com/llms.txt
> Use this file to discover all available pages before exploring further.
# Device Setup
> Configure physical device profiles for POS terminals, KDS, Queue displays, QR ordering, and mobile devices.
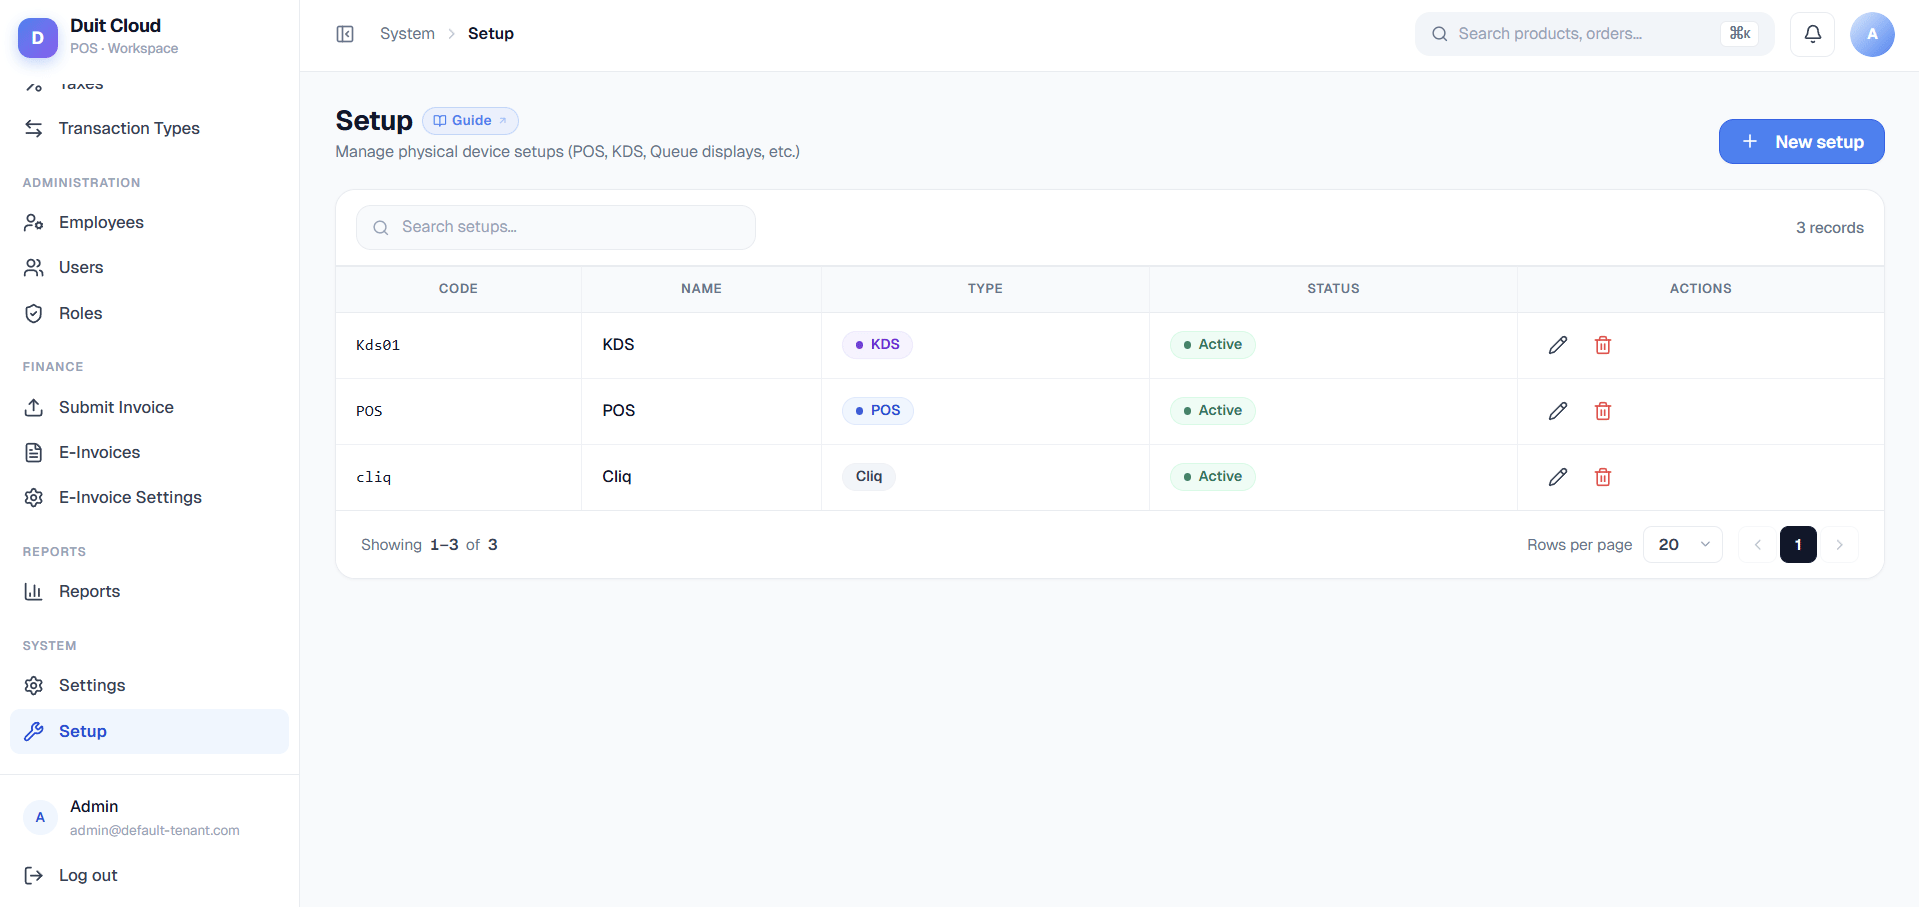
A **Setup** is a named configuration profile for one physical device in your restaurant. Each device you deploy (POS terminal, kitchen display, queue display, mobile ordering, etc.) gets its own Setup profile with a unique **Setup Code**. The physical device loads this profile by entering the Setup Code in its settings, then downloads and applies the configuration automatically. Think of it as a device blueprint that controls layout, display options, printing behavior, and location assignment.
 ## Device Types
Each Setup is tied to one **device type**, which determines what settings and capabilities are available:
| Type | Purpose | Best For |
| --------- | -------------------------------------------------------------------------------------------------------------------------- | ------------------------------------------------------------------- |
| **POS** | Main point-of-sale terminal used by staff to take orders, apply modifiers, and process payments | Counter checkout, order-taking terminals |
| **KDS** | Kitchen Display Screen — shows incoming orders to kitchen staff as a live stream without printing paper tickets | High-volume kitchens, order tracking |
| **Go** | Mobile order-taking device carried by floor staff for table-side or roaming order capture | Table service, delivery, mobile operations |
| **Queue** | Customer-facing queue display showing order numbers and status ("now serving," "order ready," etc.) in the waiting area | Pickup counters, order-ready displays |
| **Cliq** | QR-code based customer self-ordering kiosk with customizable splash screen, logo, branding, and online ordering appearance | Table QR ordering, self-service terminals, mobile customer ordering |
**Why device types matter:** Each type has different visual, functional, and security needs. A POS terminal needs a menu layout picker and payment security. A KDS doesn't need payment features but needs large, clear order displays. Cliq needs online ordering branding and splash screens. DuitPOS adjusts the Settings tab for each type so you only see relevant options.
## Basic Info Tab
The **Basic Info** tab is the same for all device types:
| Field | Required | Description |
| --------------- | -------------------- | ---------------------------------------------------------------------------------------------------------------------------------------------------------------------------------------- |
| **Device Type** | Yes | Choose POS, Go, KDS, Queue, or Cliq. Cannot be changed after creation. |
| **Code** | Yes (auto-generated) | A unique alphanumeric code that staff enters on the physical device to download this profile. Example: `POS-MAIN-001`. Shown on this page once created. |
| **Name** | Yes | A human-friendly label to help you identify the device in your list. Example: `Main Counter POS`, `Bar KDS`, `Lobby Queue Display`, or `Table 5 Cliq`. Use clear location/purpose names. |
The **Setup Code** appears after you create the profile. Staff on the physical device will enter this code (case-sensitive) in the device settings to load the configuration. Each device should get its own unique profile and code.
Write descriptive names that make it obvious where each device is physically located. Use location names like "Counter 1," "Bar," "Kitchen Station 1," or "Host Stand" so you can find the right profile when you need to adjust a device's configuration.
## Settings Tab
The **Settings** tab is where you control how the device behaves and appears. **The available settings change based on the device type you selected** — DuitPOS dynamically shows only the relevant fields for your device.
### POS Settings
For **POS** device types, the Settings tab includes:
#### Menu Layout Picker
Choose how your POS terminal displays the menu to staff. This determines how categories and products are arranged on the screen.
**Why this matters:** Your menu layout choice affects speed and navigation flow. Terminals with many products per category benefit from drilling into categories first (fewer items on screen). Small menus with few categories work well with categories always visible (faster access).
Three layout options are available, each with a visual mockup preview:
* **Categories on Top** (default)\
Category strip runs horizontally across the top of the screen. Products display in a grid below. Best for small-to-medium menus (10–50 items total) where staff can quickly scan and tap a product. Most responsive layout.
* **Categories on Left**\
Category list runs vertically down the left side. Products display in a grid on the right side. Good for medium menus (20–80 items) where staff want categories always visible while browsing products. Familiar sidebar layout.
* **Categories First** (Drill-down)\
Staff taps a category first to see only that category's products. Used for large menus (100+ items) or very complex product lists where a single screen would be overwhelming. Reduces visual clutter.
### Other POS Settings
Additional POS-specific options include:
| Setting | Description |
| ---------------------------------- | -------------------------------------------------------------------------------------------------------------------------------------------------------------------------------------------------------------- |
| **Print Shift Report** | If enabled, a shift summary ticket prints automatically when a shift closes (staff member logs out). |
| **Print KDS** | If enabled, order details also print to the kitchen printer in addition to displaying on KDS screens. Useful if you want both paper and screen. |
| **Print Table Order** | If enabled, table orders print to a receipt printer (in addition to showing on screen or KDS). |
| **Print Hold Order** | If enabled, orders placed on hold print a separate hold ticket for kitchen reference. |
| **Hide Associate on Menu** | If enabled, staff employee names are not shown on the menu/order screen (privacy or UI simplification). |
| **Second Display Welcome Message** | A text message shown on a second customer-facing display screen (e.g., above the register). Example: "Welcome! Please place your order" or "Specials today: Burger Combo \$12.99". Leave blank for no message. |
### Second Display Media (POS, Go, KDS, Cliq)
Some device types support uploading promotional images or media for a customer-facing second screen:
* **POS setups** can display a welcome message on a secondary screen.
* **Go**, **KDS**, and **Cliq** setups support image/video uploads tagged as promotional content.
Supported formats: PNG, JPEG, WebP (images); MP4, WebM (video). Use high-resolution images (1920×1080 or larger) for clarity on customer-facing displays.
### Cliq (QR Ordering) Settings
For **Cliq** device types (QR customer-ordering terminals), extensive online ordering customization is available:
| Setting | Description |
| ------------------------------ | --------------------------------------------------------------------------------------------------------------------------------------------- |
| **Splash Image** | The image customers see when they first scan the QR code (before tapping to start). Creates a professional first impression. |
| **Splash GIF** (optional) | An animated GIF that plays instead of or alongside the splash image. |
| **Brand Logo** | Your restaurant logo, shown during checkout and on the order summary. |
| **Welcome Message** | Text customers see before they start ordering. Example: "Tap anywhere to begin" or "Welcome to \[Restaurant Name]". |
| **Footer Note** | Text shown on the receipt and order summary after payment. Example: "Thank you for ordering with us" or "Look for your order at the counter". |
| **Queue Number Prefix** | A letter or symbol prefixed to queue numbers. Example: prefix "A" shows "A001, A002, A003" instead of "001, 002, 003". |
| **Reset Queue Numbers Daily** | If enabled, queue numbers reset to 001 each day at midnight. Useful for keeping numbers small and readable. |
| **Allow Guest Checkout** | If enabled, customers can complete an order without creating an account. |
| **Require Customer Name** | If enabled, customers must enter their name before checkout. Recommended for order pickup. |
| **Require Customer Phone** | If enabled, customers must enter a phone number. Used for order notifications or pickup confirmation. |
| **Allow Special Instructions** | If enabled, customers can add notes or special requests to items (e.g., "no onions," "extra sauce"). |
| **Cart TTL (hours)** | How long a cart is saved if a customer doesn't complete checkout. Example: 12 hours means a saved cart expires after 12 hours. |
| **Currency Display** | Show prices as "Symbol" (\$) or "Code" (USD). Choose based on your audience. |
| **Border Radius** | Rounded corners style for buttons and cards. Options: Small, Medium, Large, Extra Large. |
| **Font Family** | Optional Google Font name for the ordering interface. Leave blank to use system default. Example: "Inter", "Roboto", "Poppins". |
| **Accent Color** | Color used for badges, highlights, and secondary elements. Default: amber. |
| **Button Color** | Color for primary action buttons (Order, Checkout, etc.). Default: black. |
| **Button Text Color** | Text color on buttons. Default: white. |
**Why customization matters:** Cliq's appearance settings let you match your brand, reduce checkout friction, and control which information you collect. Disabling "Require Phone" makes checkout faster but you won't have customer contact info.
### Go (Mobile) Settings
**Go** device types have settings for order status display and common display/branding options (welcome message, splash image, logo, theme, etc.).
### Queue and KDS Settings
**Queue** and **KDS** devices have simplified settings focused on display behavior (order status filter, queue prefix for Queue type, image uploads).
## Locations Tab
Map a Setup profile to one or more **Locations**. The physical device tied to this profile syncs that location's catalog, pricing, menu structure, and tax rules.
**Why this matters:** If you have multiple branches (downtown and airport locations), each branch gets different pricing, different menu items, and different tax setup. Assigning a POS to the "Downtown" location means that POS sees and sells the Downtown menu. Assigning it to "Airport" instead shows the Airport menu.
You can assign one Setup to multiple locations if those locations share identical menus and pricing. Most common: one Setup per location.
Give each setup a name that clearly identifies its physical location — for example `Counter 1 POS` or `Kitchen Bar KDS`. This makes it easy to find the right profile when a device needs reconfiguring, and prevents accidentally linking a POS to the wrong location.
## Associated Setup Tab
The **Associated Setup** tab (visible only when editing, not creating) links this Setup to a related Setup, typically for multi-device workflows.
**Common use cases:**
* **Link a KDS to a POS**: "This KDS displays orders taken on the Main POS terminal." The devices sync order flow and status.
* **Link a Queue display to a POS**: "This Queue display shows orders ready for pickup from the Counter POS."
* **Link a Cliq (QR) to a POS**: "This QR ordering terminal submits orders that appear on the Counter POS and Kitchen KDS."
Associating setups ensures devices coordinate correctly. For example, if you associate a KDS to a POS, the KDS will receive orders placed on that POS in real-time.
## Create a Setup Profile
Click **Setup** in the left sidebar under the Setup & Config group.
Select the **Device Type** (POS, KDS, Go, Queue, or Cliq), then give it a descriptive **Name**. Example: "Main Counter POS" or "Bar KDS".
Fill in the device-specific settings on the **Settings** tab. These depend on your device type:
* **POS**: Choose menu layout, enable/disable print options, set second display message.
* **Cliq**: Customize splash image, logo, welcome message, queue prefix, and appearance (colors, fonts, rounded corners).
* **Go/Queue/KDS**: Configure display status and promotional images as needed.
On the **Locations** tab, check the box for each location this device will serve. Save.
Click **Create**. The system generates a unique **Setup Code** (e.g., `POS-MAIN-001`) and displays it on the profile page.
On the physical device, open DuitPOS app settings and enter the **Setup Code**. The device downloads the configuration and restarts automatically.
The Setup Code is unique and case-sensitive. Staff must enter it exactly as shown. If you need to reconfigure a device, you can edit the Setup profile and changes will sync on the device's next check-in or restart.
## Edit a Setup
Click **Edit** on any setup row to modify settings, location assignments, or associated setups. Changes take effect on the physical device the next time it syncs (usually within 1–5 minutes) or when staff restarts the app. To force an immediate update, restart the DuitPOS app on the device.
Changing a POS layout affects all orders taken after the change. If staff are in the middle of taking orders when you change the layout, they will see the new layout on their next ticket. Plan layout changes during quiet periods.
## Plain-Language Example
Here's a realistic multi-device setup for a restaurant:
**Scenario:** You run a restaurant with a main counter and a bar. You want to take QR orders from tables, and have kitchen staff see orders on a screen instead of printed tickets.
**Setup 1: Counter POS**
* Type: POS
* Name: Main Counter POS
* Layout: Categories on Left (your menu has \~50 items, staff wants categories always visible)
* Print KDS: Enabled (kitchen sees orders on screen)
* Locations: Downtown
* Setup Code: `POS-COUNTER-001`
**Setup 2: Bar KDS**
* Type: KDS
* Name: Bar KDS
* Associated Setup: Link to "Main Counter POS" (orders from Counter POS appear here)
* Locations: Downtown
* Setup Code: `KDS-BAR-001`
**Setup 3: Table QR**
* Type: Cliq
* Name: Table QR Ordering
* Splash Image: Your restaurant logo
* Welcome Message: "Welcome! Tap to order"
* Queue Prefix: A (shows A001, A002, etc.)
* Locations: Downtown
* Setup Code: `CLIQ-TABLE-001`
When a customer scans the QR code, they see your splash screen and logo, order items via the customized interface, and pay. The order appears simultaneously on the Main Counter POS and Bar KDS. Kitchen staff see orders on the KDS screen and prep accordingly. No paper tickets needed.
## Frequently Asked Questions
The device will sync the combined menu, pricing, and tax setup from all assigned locations. Use this only if multiple locations have identical catalogs and pricing. Most restaurants assign one Setup per location to keep menus separate.
No. Device type is locked at creation. If you need to repurpose a device, create a new Setup with the correct type and assign the physical device to the new Setup Code.
Edit the KDS Setup profile and go to the **Associated Setup** tab. Select the POS setup you want to link to. Save. Orders taken on the POS will now appear on the KDS screen.
Yes. Edit the Setup, go to Settings, pick a new layout, and save. The change applies when the device syncs (1–5 minutes) or on the next app restart. No Setup Code change needed.
1. Verify the Setup Code is entered exactly (case-sensitive) and matches what's shown in DuitPOS.
2. Check that the device has internet access and can reach the DuitPOS server.
3. Force-close the DuitPOS app on the device and reopen it.
4. If the issue persists, restart the device or contact support with the Setup Code and device model.
Technically yes, but not recommended. Each Setup Code should map to one physical device. If two devices use the same Setup, they will share configuration, which can cause conflicts (both printing to the same printer, both showing the same POS on the network, etc.). Create separate Setup profiles for each device.
Edit each POS Setup individually (or filter by device type and edit each row). Change the layout and save. All linked devices will pick up the change on their next sync. For large numbers of devices, consider whether batch-edit features are available in a future update.
## Related
Configure printers and routing rules so orders print to the right device (KDS, receipt, kitchen ticket, etc.)
Set up physical branches so each Setup can be assigned to the correct location with correct pricing and menu
Global account preferences (currency, language, denomination lists, etc.)
Create POS staff accounts and assign them roles and location permissions
## Device Types
Each Setup is tied to one **device type**, which determines what settings and capabilities are available:
| Type | Purpose | Best For |
| --------- | -------------------------------------------------------------------------------------------------------------------------- | ------------------------------------------------------------------- |
| **POS** | Main point-of-sale terminal used by staff to take orders, apply modifiers, and process payments | Counter checkout, order-taking terminals |
| **KDS** | Kitchen Display Screen — shows incoming orders to kitchen staff as a live stream without printing paper tickets | High-volume kitchens, order tracking |
| **Go** | Mobile order-taking device carried by floor staff for table-side or roaming order capture | Table service, delivery, mobile operations |
| **Queue** | Customer-facing queue display showing order numbers and status ("now serving," "order ready," etc.) in the waiting area | Pickup counters, order-ready displays |
| **Cliq** | QR-code based customer self-ordering kiosk with customizable splash screen, logo, branding, and online ordering appearance | Table QR ordering, self-service terminals, mobile customer ordering |
**Why device types matter:** Each type has different visual, functional, and security needs. A POS terminal needs a menu layout picker and payment security. A KDS doesn't need payment features but needs large, clear order displays. Cliq needs online ordering branding and splash screens. DuitPOS adjusts the Settings tab for each type so you only see relevant options.
## Basic Info Tab
The **Basic Info** tab is the same for all device types:
| Field | Required | Description |
| --------------- | -------------------- | ---------------------------------------------------------------------------------------------------------------------------------------------------------------------------------------- |
| **Device Type** | Yes | Choose POS, Go, KDS, Queue, or Cliq. Cannot be changed after creation. |
| **Code** | Yes (auto-generated) | A unique alphanumeric code that staff enters on the physical device to download this profile. Example: `POS-MAIN-001`. Shown on this page once created. |
| **Name** | Yes | A human-friendly label to help you identify the device in your list. Example: `Main Counter POS`, `Bar KDS`, `Lobby Queue Display`, or `Table 5 Cliq`. Use clear location/purpose names. |
The **Setup Code** appears after you create the profile. Staff on the physical device will enter this code (case-sensitive) in the device settings to load the configuration. Each device should get its own unique profile and code.
Write descriptive names that make it obvious where each device is physically located. Use location names like "Counter 1," "Bar," "Kitchen Station 1," or "Host Stand" so you can find the right profile when you need to adjust a device's configuration.
## Settings Tab
The **Settings** tab is where you control how the device behaves and appears. **The available settings change based on the device type you selected** — DuitPOS dynamically shows only the relevant fields for your device.
### POS Settings
For **POS** device types, the Settings tab includes:
#### Menu Layout Picker
Choose how your POS terminal displays the menu to staff. This determines how categories and products are arranged on the screen.
**Why this matters:** Your menu layout choice affects speed and navigation flow. Terminals with many products per category benefit from drilling into categories first (fewer items on screen). Small menus with few categories work well with categories always visible (faster access).
Three layout options are available, each with a visual mockup preview:
* **Categories on Top** (default)\
Category strip runs horizontally across the top of the screen. Products display in a grid below. Best for small-to-medium menus (10–50 items total) where staff can quickly scan and tap a product. Most responsive layout.
* **Categories on Left**\
Category list runs vertically down the left side. Products display in a grid on the right side. Good for medium menus (20–80 items) where staff want categories always visible while browsing products. Familiar sidebar layout.
* **Categories First** (Drill-down)\
Staff taps a category first to see only that category's products. Used for large menus (100+ items) or very complex product lists where a single screen would be overwhelming. Reduces visual clutter.
### Other POS Settings
Additional POS-specific options include:
| Setting | Description |
| ---------------------------------- | -------------------------------------------------------------------------------------------------------------------------------------------------------------------------------------------------------------- |
| **Print Shift Report** | If enabled, a shift summary ticket prints automatically when a shift closes (staff member logs out). |
| **Print KDS** | If enabled, order details also print to the kitchen printer in addition to displaying on KDS screens. Useful if you want both paper and screen. |
| **Print Table Order** | If enabled, table orders print to a receipt printer (in addition to showing on screen or KDS). |
| **Print Hold Order** | If enabled, orders placed on hold print a separate hold ticket for kitchen reference. |
| **Hide Associate on Menu** | If enabled, staff employee names are not shown on the menu/order screen (privacy or UI simplification). |
| **Second Display Welcome Message** | A text message shown on a second customer-facing display screen (e.g., above the register). Example: "Welcome! Please place your order" or "Specials today: Burger Combo \$12.99". Leave blank for no message. |
### Second Display Media (POS, Go, KDS, Cliq)
Some device types support uploading promotional images or media for a customer-facing second screen:
* **POS setups** can display a welcome message on a secondary screen.
* **Go**, **KDS**, and **Cliq** setups support image/video uploads tagged as promotional content.
Supported formats: PNG, JPEG, WebP (images); MP4, WebM (video). Use high-resolution images (1920×1080 or larger) for clarity on customer-facing displays.
### Cliq (QR Ordering) Settings
For **Cliq** device types (QR customer-ordering terminals), extensive online ordering customization is available:
| Setting | Description |
| ------------------------------ | --------------------------------------------------------------------------------------------------------------------------------------------- |
| **Splash Image** | The image customers see when they first scan the QR code (before tapping to start). Creates a professional first impression. |
| **Splash GIF** (optional) | An animated GIF that plays instead of or alongside the splash image. |
| **Brand Logo** | Your restaurant logo, shown during checkout and on the order summary. |
| **Welcome Message** | Text customers see before they start ordering. Example: "Tap anywhere to begin" or "Welcome to \[Restaurant Name]". |
| **Footer Note** | Text shown on the receipt and order summary after payment. Example: "Thank you for ordering with us" or "Look for your order at the counter". |
| **Queue Number Prefix** | A letter or symbol prefixed to queue numbers. Example: prefix "A" shows "A001, A002, A003" instead of "001, 002, 003". |
| **Reset Queue Numbers Daily** | If enabled, queue numbers reset to 001 each day at midnight. Useful for keeping numbers small and readable. |
| **Allow Guest Checkout** | If enabled, customers can complete an order without creating an account. |
| **Require Customer Name** | If enabled, customers must enter their name before checkout. Recommended for order pickup. |
| **Require Customer Phone** | If enabled, customers must enter a phone number. Used for order notifications or pickup confirmation. |
| **Allow Special Instructions** | If enabled, customers can add notes or special requests to items (e.g., "no onions," "extra sauce"). |
| **Cart TTL (hours)** | How long a cart is saved if a customer doesn't complete checkout. Example: 12 hours means a saved cart expires after 12 hours. |
| **Currency Display** | Show prices as "Symbol" (\$) or "Code" (USD). Choose based on your audience. |
| **Border Radius** | Rounded corners style for buttons and cards. Options: Small, Medium, Large, Extra Large. |
| **Font Family** | Optional Google Font name for the ordering interface. Leave blank to use system default. Example: "Inter", "Roboto", "Poppins". |
| **Accent Color** | Color used for badges, highlights, and secondary elements. Default: amber. |
| **Button Color** | Color for primary action buttons (Order, Checkout, etc.). Default: black. |
| **Button Text Color** | Text color on buttons. Default: white. |
**Why customization matters:** Cliq's appearance settings let you match your brand, reduce checkout friction, and control which information you collect. Disabling "Require Phone" makes checkout faster but you won't have customer contact info.
### Go (Mobile) Settings
**Go** device types have settings for order status display and common display/branding options (welcome message, splash image, logo, theme, etc.).
### Queue and KDS Settings
**Queue** and **KDS** devices have simplified settings focused on display behavior (order status filter, queue prefix for Queue type, image uploads).
## Locations Tab
Map a Setup profile to one or more **Locations**. The physical device tied to this profile syncs that location's catalog, pricing, menu structure, and tax rules.
**Why this matters:** If you have multiple branches (downtown and airport locations), each branch gets different pricing, different menu items, and different tax setup. Assigning a POS to the "Downtown" location means that POS sees and sells the Downtown menu. Assigning it to "Airport" instead shows the Airport menu.
You can assign one Setup to multiple locations if those locations share identical menus and pricing. Most common: one Setup per location.
Give each setup a name that clearly identifies its physical location — for example `Counter 1 POS` or `Kitchen Bar KDS`. This makes it easy to find the right profile when a device needs reconfiguring, and prevents accidentally linking a POS to the wrong location.
## Associated Setup Tab
The **Associated Setup** tab (visible only when editing, not creating) links this Setup to a related Setup, typically for multi-device workflows.
**Common use cases:**
* **Link a KDS to a POS**: "This KDS displays orders taken on the Main POS terminal." The devices sync order flow and status.
* **Link a Queue display to a POS**: "This Queue display shows orders ready for pickup from the Counter POS."
* **Link a Cliq (QR) to a POS**: "This QR ordering terminal submits orders that appear on the Counter POS and Kitchen KDS."
Associating setups ensures devices coordinate correctly. For example, if you associate a KDS to a POS, the KDS will receive orders placed on that POS in real-time.
## Create a Setup Profile
Click **Setup** in the left sidebar under the Setup & Config group.
Select the **Device Type** (POS, KDS, Go, Queue, or Cliq), then give it a descriptive **Name**. Example: "Main Counter POS" or "Bar KDS".
Fill in the device-specific settings on the **Settings** tab. These depend on your device type:
* **POS**: Choose menu layout, enable/disable print options, set second display message.
* **Cliq**: Customize splash image, logo, welcome message, queue prefix, and appearance (colors, fonts, rounded corners).
* **Go/Queue/KDS**: Configure display status and promotional images as needed.
On the **Locations** tab, check the box for each location this device will serve. Save.
Click **Create**. The system generates a unique **Setup Code** (e.g., `POS-MAIN-001`) and displays it on the profile page.
On the physical device, open DuitPOS app settings and enter the **Setup Code**. The device downloads the configuration and restarts automatically.
The Setup Code is unique and case-sensitive. Staff must enter it exactly as shown. If you need to reconfigure a device, you can edit the Setup profile and changes will sync on the device's next check-in or restart.
## Edit a Setup
Click **Edit** on any setup row to modify settings, location assignments, or associated setups. Changes take effect on the physical device the next time it syncs (usually within 1–5 minutes) or when staff restarts the app. To force an immediate update, restart the DuitPOS app on the device.
Changing a POS layout affects all orders taken after the change. If staff are in the middle of taking orders when you change the layout, they will see the new layout on their next ticket. Plan layout changes during quiet periods.
## Plain-Language Example
Here's a realistic multi-device setup for a restaurant:
**Scenario:** You run a restaurant with a main counter and a bar. You want to take QR orders from tables, and have kitchen staff see orders on a screen instead of printed tickets.
**Setup 1: Counter POS**
* Type: POS
* Name: Main Counter POS
* Layout: Categories on Left (your menu has \~50 items, staff wants categories always visible)
* Print KDS: Enabled (kitchen sees orders on screen)
* Locations: Downtown
* Setup Code: `POS-COUNTER-001`
**Setup 2: Bar KDS**
* Type: KDS
* Name: Bar KDS
* Associated Setup: Link to "Main Counter POS" (orders from Counter POS appear here)
* Locations: Downtown
* Setup Code: `KDS-BAR-001`
**Setup 3: Table QR**
* Type: Cliq
* Name: Table QR Ordering
* Splash Image: Your restaurant logo
* Welcome Message: "Welcome! Tap to order"
* Queue Prefix: A (shows A001, A002, etc.)
* Locations: Downtown
* Setup Code: `CLIQ-TABLE-001`
When a customer scans the QR code, they see your splash screen and logo, order items via the customized interface, and pay. The order appears simultaneously on the Main Counter POS and Bar KDS. Kitchen staff see orders on the KDS screen and prep accordingly. No paper tickets needed.
## Frequently Asked Questions
The device will sync the combined menu, pricing, and tax setup from all assigned locations. Use this only if multiple locations have identical catalogs and pricing. Most restaurants assign one Setup per location to keep menus separate.
No. Device type is locked at creation. If you need to repurpose a device, create a new Setup with the correct type and assign the physical device to the new Setup Code.
Edit the KDS Setup profile and go to the **Associated Setup** tab. Select the POS setup you want to link to. Save. Orders taken on the POS will now appear on the KDS screen.
Yes. Edit the Setup, go to Settings, pick a new layout, and save. The change applies when the device syncs (1–5 minutes) or on the next app restart. No Setup Code change needed.
1. Verify the Setup Code is entered exactly (case-sensitive) and matches what's shown in DuitPOS.
2. Check that the device has internet access and can reach the DuitPOS server.
3. Force-close the DuitPOS app on the device and reopen it.
4. If the issue persists, restart the device or contact support with the Setup Code and device model.
Technically yes, but not recommended. Each Setup Code should map to one physical device. If two devices use the same Setup, they will share configuration, which can cause conflicts (both printing to the same printer, both showing the same POS on the network, etc.). Create separate Setup profiles for each device.
Edit each POS Setup individually (or filter by device type and edit each row). Change the layout and save. All linked devices will pick up the change on their next sync. For large numbers of devices, consider whether batch-edit features are available in a future update.
## Related
Configure printers and routing rules so orders print to the right device (KDS, receipt, kitchen ticket, etc.)
Set up physical branches so each Setup can be assigned to the correct location with correct pricing and menu
Global account preferences (currency, language, denomination lists, etc.)
Create POS staff accounts and assign them roles and location permissions