
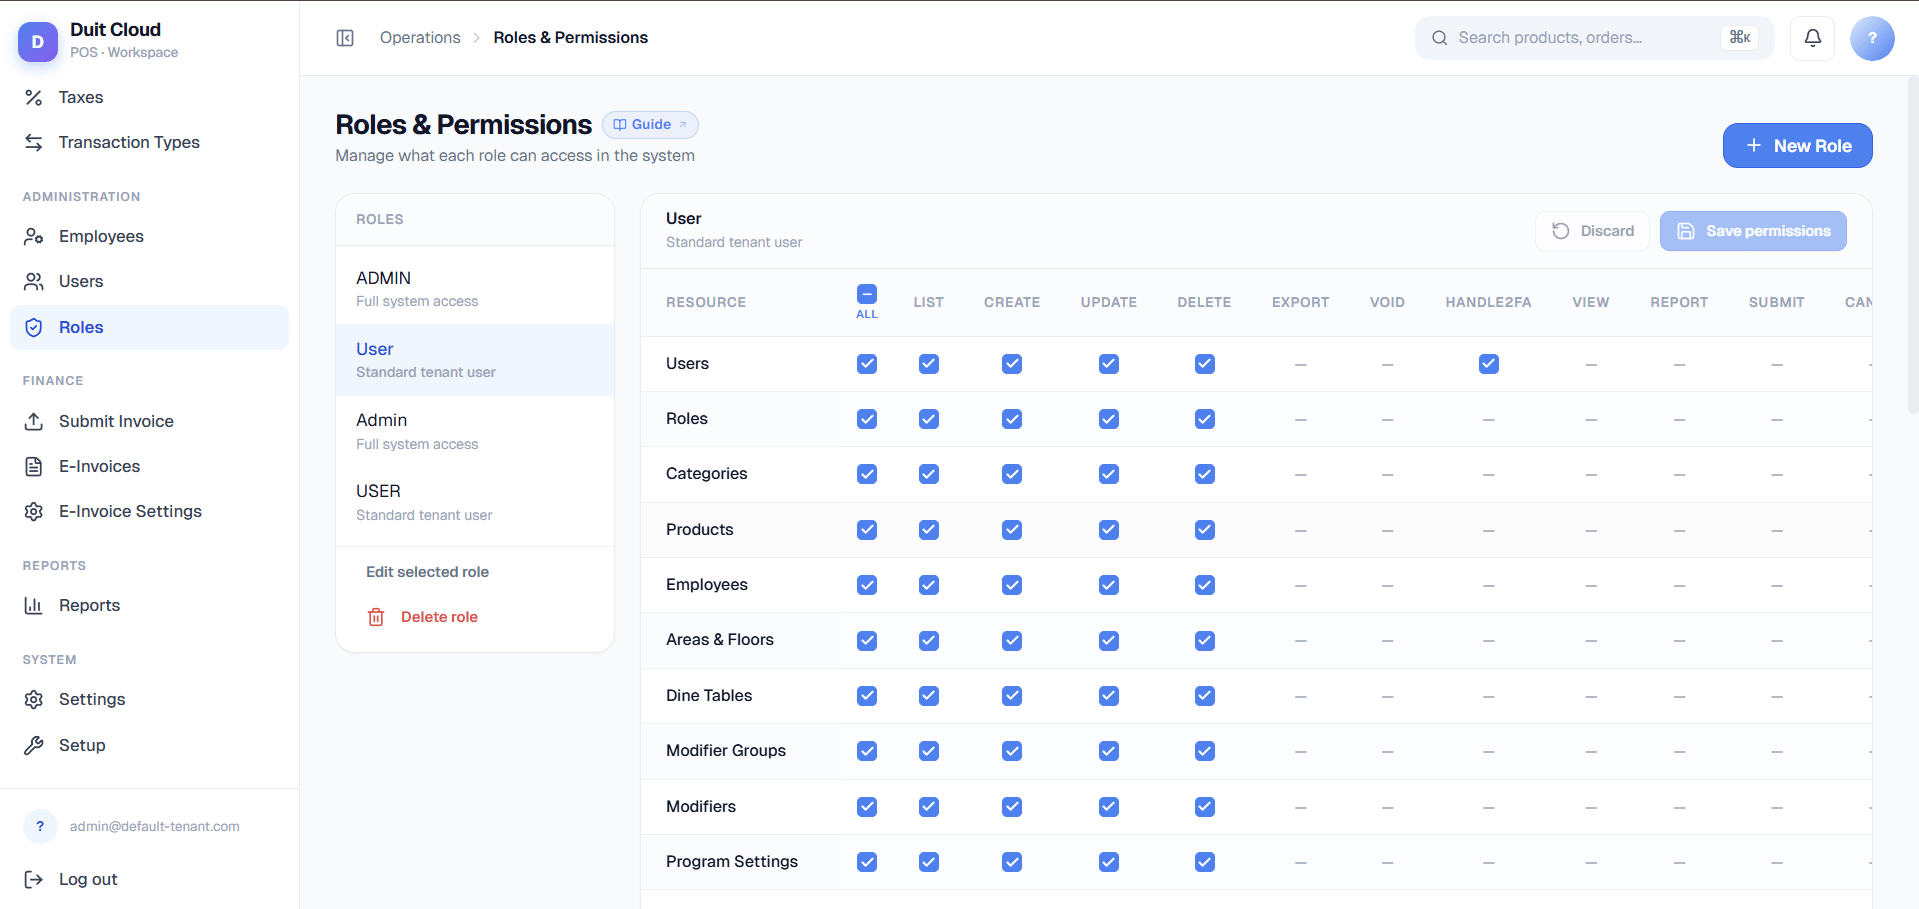
These permissions are the building blocks of roles. To create a new role or assign permissions to a user, see Users and Roles. This page is a reference guide for understanding what each permission controls.
Permission Groups
Manage
Menu
Users
Staff
Reports
Online Ordering
E-Invoicing
Platform Admin (Root Users Only)
These permissions only apply to root admin accounts and are separate from the tenant role system above — a tenant role can never grant access to these.How Permissions Work
- Permissions are always assigned to a role, never directly to a user.
- A user can have multiple roles — they receive the union of all permissions across their roles.
- Removing a permission from a role takes effect immediately for all users with that role. Users currently logged in will lose access on their next page load.
Frequently Asked Questions
A user says they cannot see a page — how do I fix it?
A user says they cannot see a page — how do I fix it?
Go to Users → Roles, open the role assigned to that user, and check whether the required permission (e.g. Reports — View) is toggled on. Save and ask the user to refresh their browser.
Can I grant a user access to only one specific feature?
Can I grant a user access to only one specific feature?
Yes. Create a role with only the permissions that feature requires (e.g. only Reports — View) and assign that role to the user.
What happens if I remove a permission from a role while a user is logged in?
What happens if I remove a permission from a role while a user is logged in?
The change takes effect on the user’s next page load or navigation. They will see an “Access Denied” message if they try to access a page the updated role no longer permits.
Is there a way to see all permissions a specific user has?
Is there a way to see all permissions a specific user has?
Not directly on the user page — you need to check each role assigned to the user and combine the permissions. A future update will show a merged permissions view per user.
How do I know which permissions to assign to a new role?
How do I know which permissions to assign to a new role?
Start with an existing role that is closest to your use case (e.g. Manager for admin, Cashier for POS operators). In the Users and Roles section, duplicate that role and remove or add specific permissions. For example, a Stock Manager might copy Manager permissions but remove Users — Delete and E-Invoicing permissions. Test the role with a test account to confirm access is correct.
Related
Users & Roles
Create roles and assign them to users
Tenant Operations
Destructive root-only actions
Dashboard Overview
Understand what each section does
Login Problems
Fix access issues