The Three-Layer Model
Understanding the structure helps you scale your menu efficiently:- Modifier Group — a container and policy (e.g. “Cheese Options” with Min 1, Max 1 selection)
- Modifier Items — individual options inside the group (e.g. “No Cheese”, “Regular Cheddar”, “Extra Cheddar +RM 0.50”), each with its own price and settings
- Mappings — rules that attach the group to products or categories, so those items show on the POS checkout screen
- Create group: “Cheese Options” (Min 1, Max 1 — customer picks exactly one)
- Add items: “No Cheese” (RM 0), “Regular Cheddar” (RM 0), “Extra Cheddar” (+RM 0.50)
- Map to category: “Burgers” — now every burger in your menu offers these cheese choices
- Map to specific product: “Deluxe Pizza” (on top of any category mapping) — now pizza gets the group too
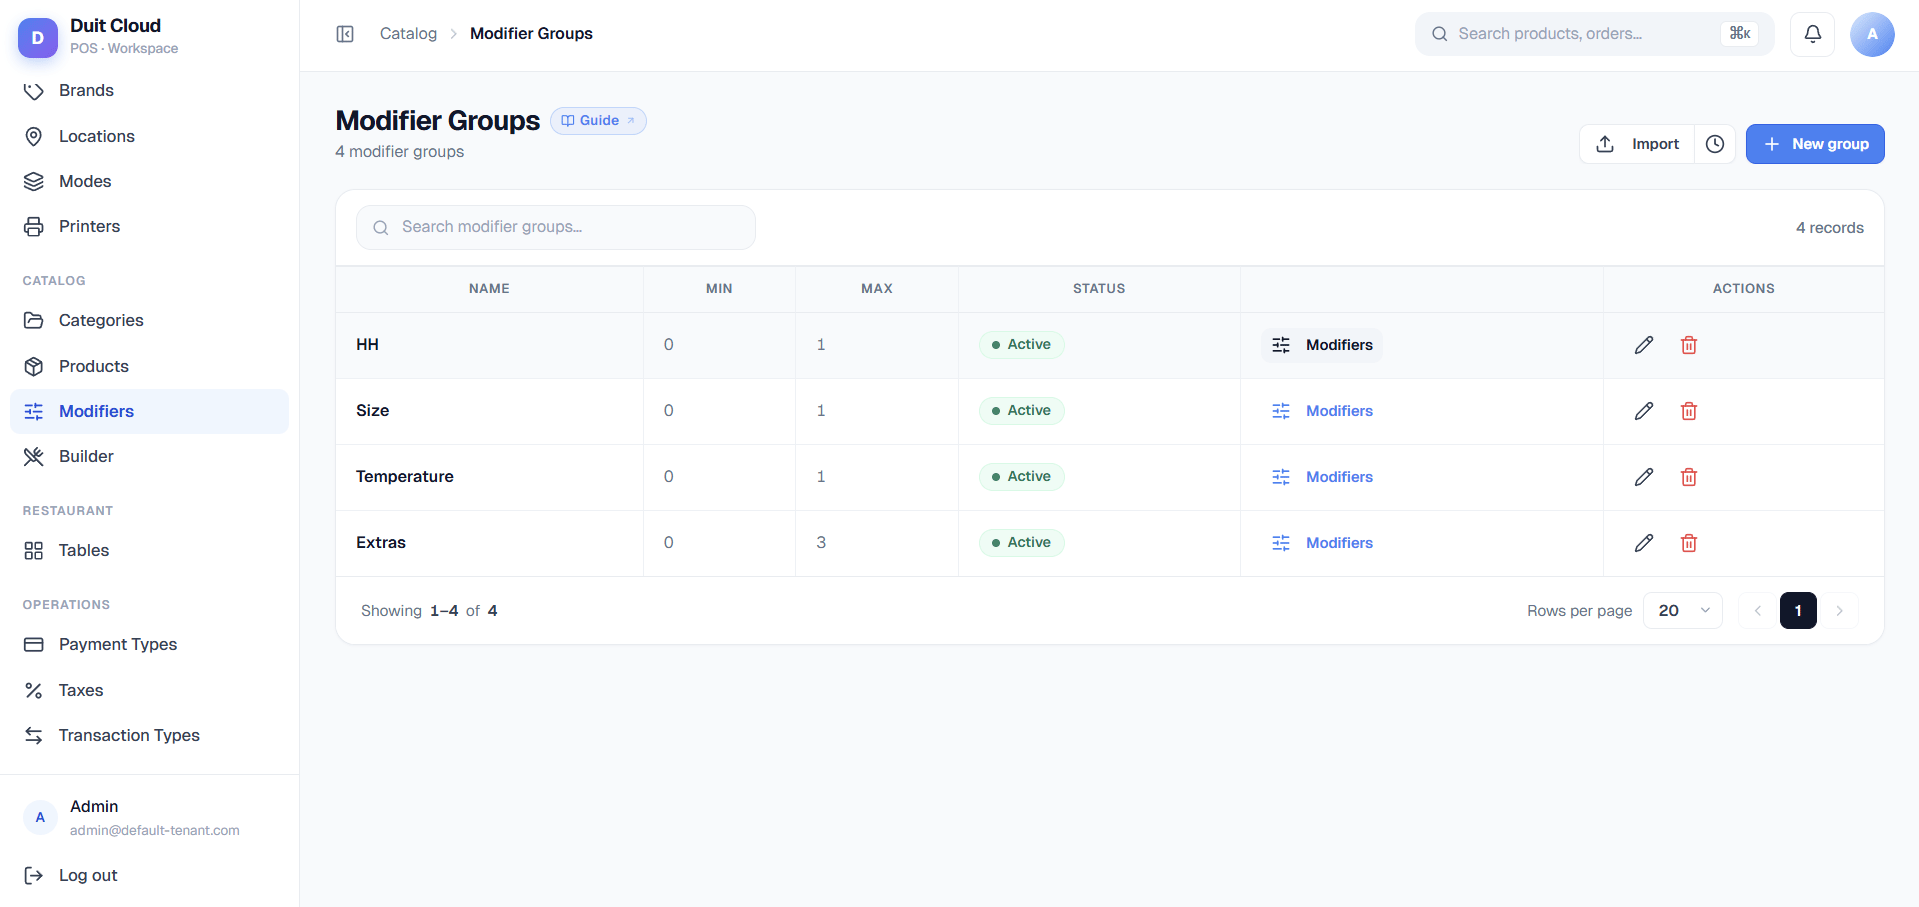
Modifier Groups
A Modifier Group is a named collection of options. The group defines how many options a customer must or can pick from.Modifier Items
Once you create a group, the Modifier Items tab shows a CRUD table of individual options inside that group. Each item is a choice a customer can make.
Example items for a “Size” group (Min 1, Max 1):
- Small — RM 0
- Medium — RM 1.00
- Large — RM 2.00
- Extra Cheese — RM 0.50
- Bacon — RM 1.50
- Avocado — RM 2.00
Create a Modifier Group
1
Go to Catalog → Modifiers
Click Modifiers in the left sidebar under Catalog.
2
Click New Group
Enter the group name (e.g.
Size or Cheese Options), optional description, and set Min and Max selections.3
Save and add items
Click Create Group. The group detail page opens, and you can see the Modifier Items tab. Click Add Item to add each option with its price adjustment.
4
Save items
Click Save for each item. Once your items are ready, move to the Mappings tab to assign the group to products or categories.
Mappings
After creating a Modifier Group and its items, you need to attach (map) that group to products or categories so it appears on the POS checkout screen. The Mappings tab shows how many products currently have this group and lets you bulk-assign or remove it.Assign by Category
Assign this modifier group to every product currently in a selected category in one action. How it works:- Choose a category (e.g. “Burgers”)
- The group is attached to all existing products in that category at that moment
- New products added to the category later are not automatically included — this is a one-time bulk action, not a live rule
- If you add new burgers to your menu, re-run this action or attach the group to individual products
Assign by Product
Assign this modifier group to a hand-picked list of specific products, regardless of their category. How it works:- Search or multi-select individual products
- The group is attached only to those chosen products
- Useful for fine-grained control when some products in a category shouldn’t have the group (e.g. “Vodka Sauce” modifier group applied only to select pasta items, not all pastas)
Managing Mappings
Common Examples
Frequently Asked Questions
What is the difference between required and optional modifiers?
What is the difference between required and optional modifiers?
If Min Selections is
1 or more, the modifier group is required — staff cannot complete the order without making a selection. If Min is 0, the group is optional and staff can skip it. Use required modifiers for choices like Size where there is no sensible default.What's the difference between 'Max Selections' on the group and 'Max Items' on an individual modifier?
What's the difference between 'Max Selections' on the group and 'Max Items' on an individual modifier?
Max Selections (on the group) — the maximum number of different items the customer can pick from this group. E.g. if Max Selections = 3 in an “Add-ons” group with items [Cheese, Bacon, Avocado], the customer can pick any combination up to 3 items: Cheese + Bacon, or Bacon + Avocado + Cheese, etc. Max Items (on an individual item) — the maximum quantity of that one specific option they can add. E.g. if Bacon has Max Items = 2, the customer can add Bacon twice in a single order, but that counts as 2 toward the group’s Max Selections. In most cases, Max Items is left blank (defaults to unlimited quantity of that item, subject to the group’s Max Selections limit). It’s rarely needed except for special cases (e.g. limiting a premium topping to 1 per order).
Can I use the same modifier group on multiple products?
Can I use the same modifier group on multiple products?
Yes. Create the group once and attach it to as many products as you like. If you update the group (e.g. change a price or add a new item), the change applies to all products that use it.
Can modifier options have different prices?
Can modifier options have different prices?
Yes. Each option can have its own price adjustment. You can also set an option to RM 0 if it has no extra cost.
Can I assign a modifier group to just one product?
Can I assign a modifier group to just one product?
Yes. Use the Assign by Product mode in the Mappings tab to hand-pick specific products, or go to Menu Builder → Products → Edit → Modifiers and select the group for that one product. Both approaches work for single-product assignments.
Why is a modifier group not appearing on the POS for a product?
Why is a modifier group not appearing on the POS for a product?
Make sure the group has been attached to that product — either individually under Menu Builder → Products → Edit → Modifiers, or in bulk via Assign to Category / Assign by Product in the Mappings tab on the Modifiers page. Creating a modifier group does not automatically apply it to any product; it must be mapped.
I assigned a group to a category — why doesn't a newly added product in that category have it?
I assigned a group to a category — why doesn't a newly added product in that category have it?
Category assignment runs once, against the products in the category at that moment. It is not a standing rule. After adding new products to the category, either re-run Assign to Category on the group, or attach the group to the new product individually.
Related
Products
Attach modifier groups to individual products via the Modifiers tab on product edit
Menu Builder
Drag-and-drop 3-panel menu layout with inline modifier assignment on product detail
Categories
Organise products into categories, then bulk-assign modifier groups to entire categories
Bulk Pricing
Override prices and availability per context (separate from modifier price adjustments)