Device Types
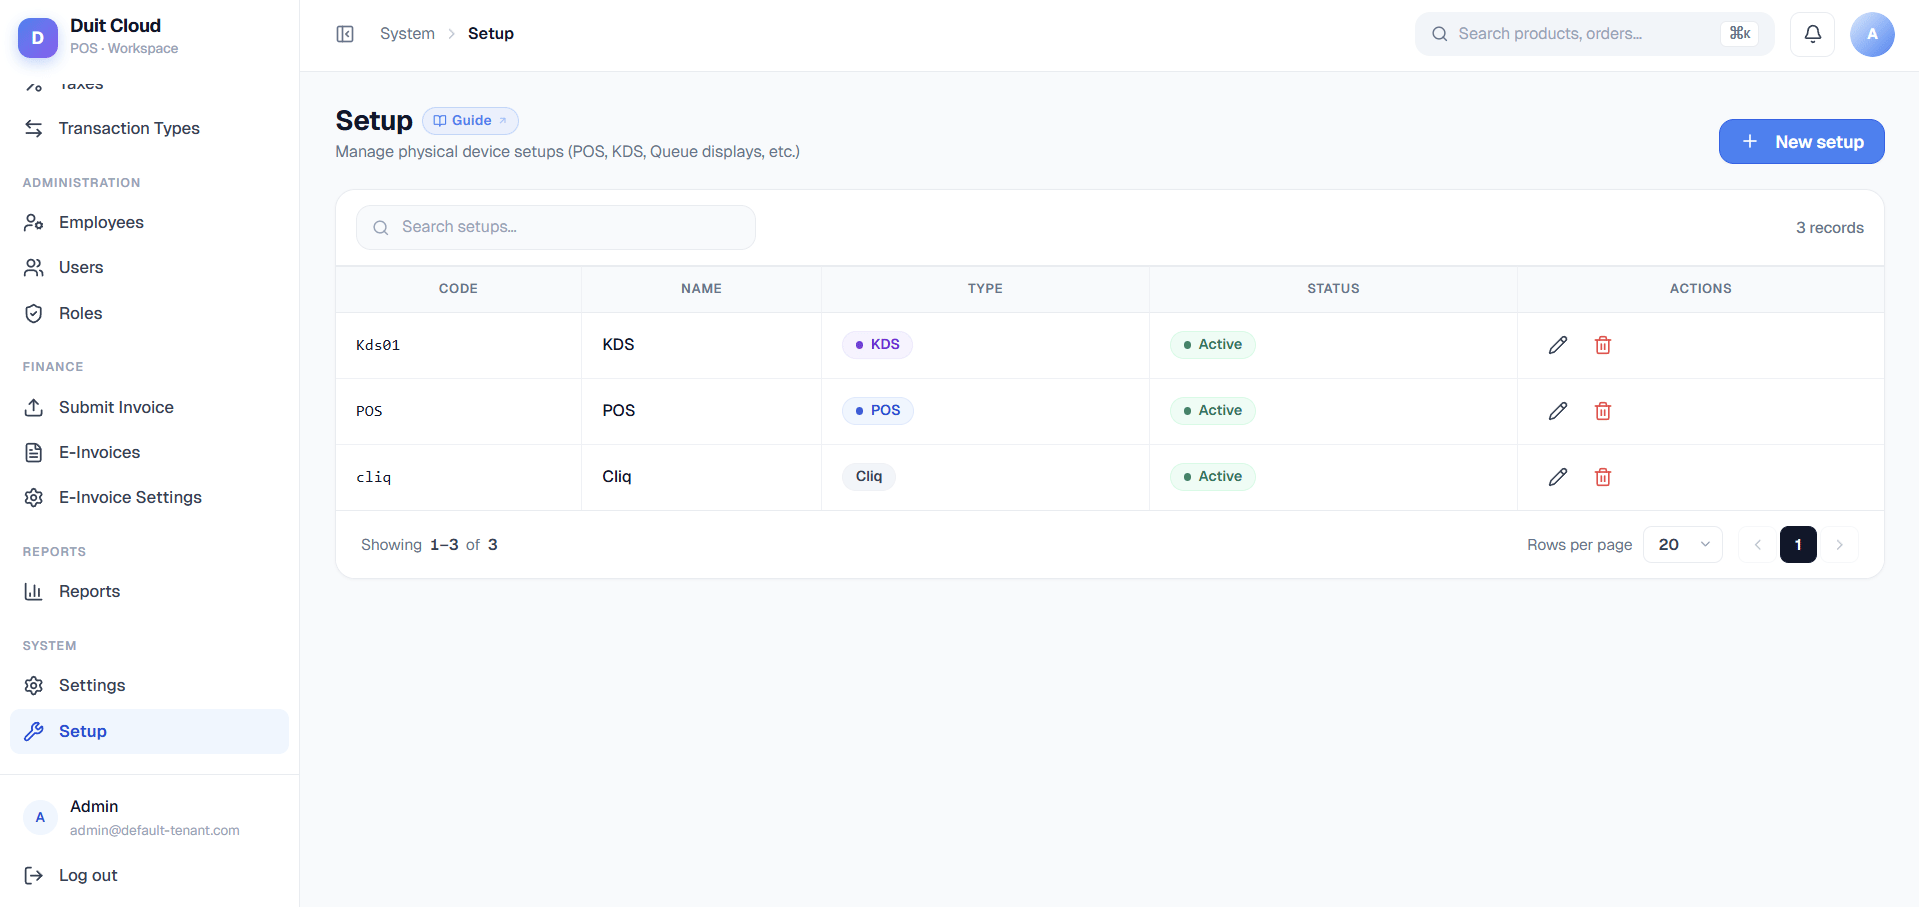
Each Setup is tied to one device type, which determines what settings and capabilities are available:
Why device types matter: Each type has different visual, functional, and security needs. A POS terminal needs a menu layout picker and payment security. A KDS doesn’t need payment features but needs large, clear order displays. Cliq needs online ordering branding and splash screens. DuitPOS adjusts the Settings tab for each type so you only see relevant options.
Basic Info Tab
The Basic Info tab is the same for all device types:
The Setup Code appears after you create the profile. Staff on the physical device will enter this code (case-sensitive) in the device settings to load the configuration. Each device should get its own unique profile and code.
Settings Tab
The Settings tab is where you control how the device behaves and appears. The available settings change based on the device type you selected — DuitPOS dynamically shows only the relevant fields for your device.POS Settings
For POS device types, the Settings tab includes:Menu Layout Picker
Choose how your POS terminal displays the menu to staff. This determines how categories and products are arranged on the screen. Why this matters: Your menu layout choice affects speed and navigation flow. Terminals with many products per category benefit from drilling into categories first (fewer items on screen). Small menus with few categories work well with categories always visible (faster access). Three layout options are available, each with a visual mockup preview:-
Categories on Top (default)
Category strip runs horizontally across the top of the screen. Products display in a grid below. Best for small-to-medium menus (10–50 items total) where staff can quickly scan and tap a product. Most responsive layout. -
Categories on Left
Category list runs vertically down the left side. Products display in a grid on the right side. Good for medium menus (20–80 items) where staff want categories always visible while browsing products. Familiar sidebar layout. -
Categories First (Drill-down)
Staff taps a category first to see only that category’s products. Used for large menus (100+ items) or very complex product lists where a single screen would be overwhelming. Reduces visual clutter.
Other POS Settings
Additional POS-specific options include:Second Display Media (POS, Go, KDS, Cliq)
Some device types support uploading promotional images or media for a customer-facing second screen:- POS setups can display a welcome message on a secondary screen.
- Go, KDS, and Cliq setups support image/video uploads tagged as promotional content.
Cliq (QR Ordering) Settings
For Cliq device types (QR customer-ordering terminals), extensive online ordering customization is available:
Why customization matters: Cliq’s appearance settings let you match your brand, reduce checkout friction, and control which information you collect. Disabling “Require Phone” makes checkout faster but you won’t have customer contact info.
Go (Mobile) Settings
Go device types have settings for order status display and common display/branding options (welcome message, splash image, logo, theme, etc.).Queue and KDS Settings
Queue and KDS devices have simplified settings focused on display behavior (order status filter, queue prefix for Queue type, image uploads).Locations Tab
Map a Setup profile to one or more Locations. The physical device tied to this profile syncs that location’s catalog, pricing, menu structure, and tax rules. Why this matters: If you have multiple branches (downtown and airport locations), each branch gets different pricing, different menu items, and different tax setup. Assigning a POS to the “Downtown” location means that POS sees and sells the Downtown menu. Assigning it to “Airport” instead shows the Airport menu. You can assign one Setup to multiple locations if those locations share identical menus and pricing. Most common: one Setup per location.Associated Setup Tab
The Associated Setup tab (visible only when editing, not creating) links this Setup to a related Setup, typically for multi-device workflows. Common use cases:- Link a KDS to a POS: “This KDS displays orders taken on the Main POS terminal.” The devices sync order flow and status.
- Link a Queue display to a POS: “This Queue display shows orders ready for pickup from the Counter POS.”
- Link a Cliq (QR) to a POS: “This QR ordering terminal submits orders that appear on the Counter POS and Kitchen KDS.”
Create a Setup Profile
1
Go to Setup & Config → Setup
Click Setup in the left sidebar under the Setup & Config group.
2
Click New Setup
Select the Device Type (POS, KDS, Go, Queue, or Cliq), then give it a descriptive Name. Example: “Main Counter POS” or “Bar KDS”.
3
Configure settings
Fill in the device-specific settings on the Settings tab. These depend on your device type:
- POS: Choose menu layout, enable/disable print options, set second display message.
- Cliq: Customize splash image, logo, welcome message, queue prefix, and appearance (colors, fonts, rounded corners).
- Go/Queue/KDS: Configure display status and promotional images as needed.
4
Map locations
On the Locations tab, check the box for each location this device will serve. Save.
5
Save
Click Create. The system generates a unique Setup Code (e.g.,
POS-MAIN-001) and displays it on the profile page.6
Apply to physical device
On the physical device, open DuitPOS app settings and enter the Setup Code. The device downloads the configuration and restarts automatically.
Edit a Setup
Click Edit on any setup row to modify settings, location assignments, or associated setups. Changes take effect on the physical device the next time it syncs (usually within 1–5 minutes) or when staff restarts the app. To force an immediate update, restart the DuitPOS app on the device.Plain-Language Example
Here’s a realistic multi-device setup for a restaurant: Scenario: You run a restaurant with a main counter and a bar. You want to take QR orders from tables, and have kitchen staff see orders on a screen instead of printed tickets. Setup 1: Counter POS- Type: POS
- Name: Main Counter POS
- Layout: Categories on Left (your menu has ~50 items, staff wants categories always visible)
- Print KDS: Enabled (kitchen sees orders on screen)
- Locations: Downtown
- Setup Code:
POS-COUNTER-001
- Type: KDS
- Name: Bar KDS
- Associated Setup: Link to “Main Counter POS” (orders from Counter POS appear here)
- Locations: Downtown
- Setup Code:
KDS-BAR-001
- Type: Cliq
- Name: Table QR Ordering
- Splash Image: Your restaurant logo
- Welcome Message: “Welcome! Tap to order”
- Queue Prefix: A (shows A001, A002, etc.)
- Locations: Downtown
- Setup Code:
CLIQ-TABLE-001
Frequently Asked Questions
What happens if I assign one Setup to multiple locations?
What happens if I assign one Setup to multiple locations?
The device will sync the combined menu, pricing, and tax setup from all assigned locations. Use this only if multiple locations have identical catalogs and pricing. Most restaurants assign one Setup per location to keep menus separate.
Can I change a device type after creating a Setup?
Can I change a device type after creating a Setup?
No. Device type is locked at creation. If you need to repurpose a device, create a new Setup with the correct type and assign the physical device to the new Setup Code.
How do I link a KDS to a POS so they sync orders?
How do I link a KDS to a POS so they sync orders?
Edit the KDS Setup profile and go to the Associated Setup tab. Select the POS setup you want to link to. Save. Orders taken on the POS will now appear on the KDS screen.
What should I do if the physical device isn't loading the configuration?
What should I do if the physical device isn't loading the configuration?
- Verify the Setup Code is entered exactly (case-sensitive) and matches what’s shown in DuitPOS.
- Check that the device has internet access and can reach the DuitPOS server.
- Force-close the DuitPOS app on the device and reopen it.
- If the issue persists, restart the device or contact support with the Setup Code and device model.
Can multiple physical devices use the same Setup Code?
Can multiple physical devices use the same Setup Code?
Technically yes, but not recommended. Each Setup Code should map to one physical device. If two devices use the same Setup, they will share configuration, which can cause conflicts (both printing to the same printer, both showing the same POS on the network, etc.). Create separate Setup profiles for each device.
Related
Printers
Configure printers and routing rules so orders print to the right device (KDS, receipt, kitchen ticket, etc.)
Locations
Set up physical branches so each Setup can be assigned to the correct location with correct pricing and menu
Settings
Global account preferences (currency, language, denomination lists, etc.)
Employees
Create POS staff accounts and assign them roles and location permissions