Product Fields
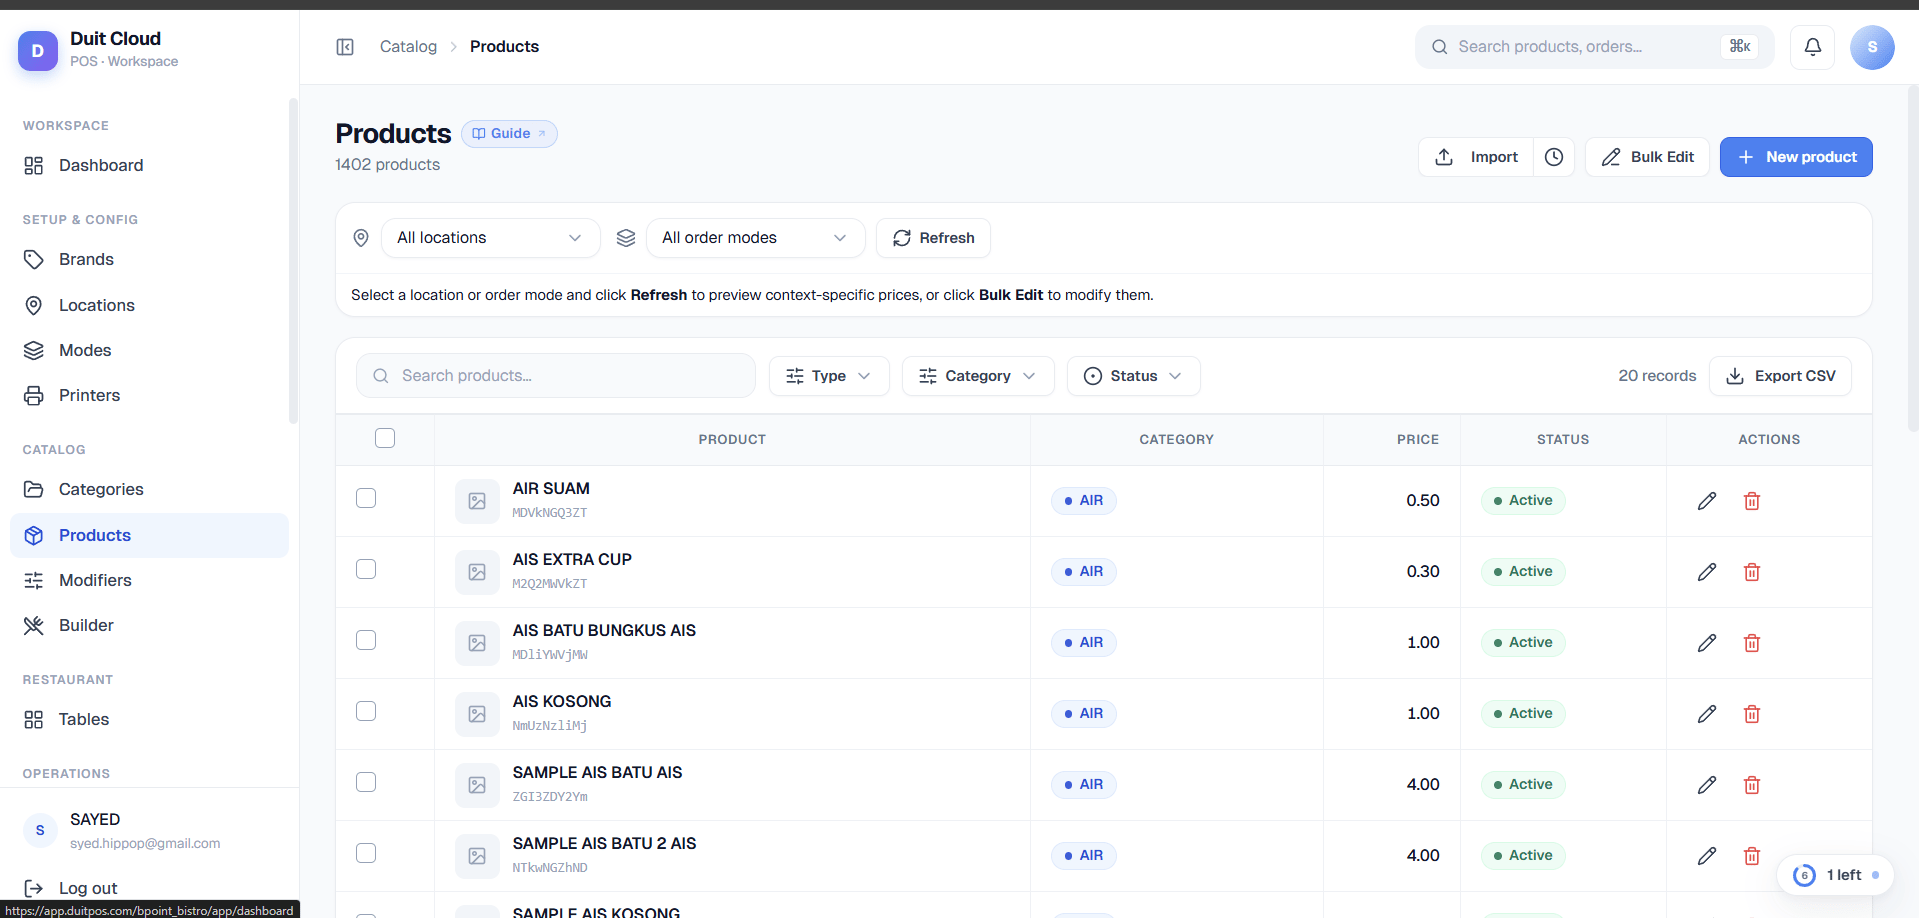
Create a Product
1
Go to Menu Builder → Products
Select a category in the Menu Builder first to scope where the product appears. Or navigate via the Products sidebar link.
2
Click New Product
Fill in the required fields: Name, Price, and Category.
3
Add modifiers (optional)
In the Modifiers tab, attach modifier groups (e.g. Size, Add-ons). See Modifiers.
4
Save
Click Create (or Save on the edit page). The product is immediately available on the POS.
Edit a Product
Click the Edit icon on any product row to open the product editor. The editor has four tabs — plus two more, Stock and Linked Entries, if your account has the Retail & Inventory module enabled:- Details — Product name, price, category, tax, brand, barcode, image, and active status.
- Variants — Link variant products (e.g. different sizes) if you’ve organized them as separate products.
- Modifiers — Attach modifier groups (e.g. Size, Add-ons) and select which modifiers apply to this product.
- Pricing & Availability — Set context-specific price, name, and availability overrides per location and/or order mode (see below).
- Stock (Retail only) — Inventory tracking settings for this product. See below.
- Linked Entries (Retail only) — Every purchase/sales document that references this product. See below.
Pricing & Availability Overrides
The Pricing & Availability tab lets you override a product’s base price, display name, and visibility for specific locations and/or order modes. This is useful for delivery surcharges, location-specific pricing, time-based promotions, or hiding products in certain contexts.How Overrides Work
An override is a row that specifies:- A Location (or blank for all locations)
- An Order Mode (or blank for all order modes)
- An Override Price (or blank to use the base price)
- A Display Name (or blank to use the base name)
- Visibility — Inherit (use base active status), Visible (show in this context), or Hidden (hide in this context)
- An override with Location = Downtown and Order Mode = blank applies to all order modes at Downtown.
- An override with Location = blank and Order Mode = Delivery applies to delivery orders at all locations.
- An override with both blank applies everywhere (this is the global default).
Override Priority
When an order comes in, the system picks the most specific override that matches. Each field (price, name, visibility) resolves independently — meaning a single product’s price can come from a location-only override while its name comes from an order-mode-only override. Priority order (highest to lowest):- Both Location and Order Mode specified (Priority 1100) — most specific match.
- Location only (Priority 1000) — applies to that location across all order modes.
- Order Mode only (Priority 100) — applies to that order mode across all locations.
- Both blank (Priority 0) — global default, applies everywhere if no more specific override exists.
Using the Pricing & Availability Tab
1
Open the product and go to Pricing & Availability
On an existing product, click Edit, then click the Pricing & Availability tab.
2
Click Add Override
Choose the Location (or leave blank for all locations) and Order Mode (or leave blank for all order modes).
3
Enter override values
Fill in the Override Price (or leave blank to inherit the base price), Display Name (or leave blank), and set Visibility (Inherit, Visible, or Hidden).
4
Save
Click Save. The override takes effect immediately for new orders in that context.
Stock tab
Only visible if your account has the Retail & Inventory module enabled — see Retail Overview.
Linked Entries tab
Only visible if your account has the Retail & Inventory module enabled.
Delete a Product
Click Delete on the product row.Frequently Asked Questions
Why is a product not showing on the POS?
Why is a product not showing on the POS?
Check four things: (1) The product is set to Active. (2) The product’s Category is set to Active. (3) Check the Pricing & Availability tab — if the product has a Visibility override set to Hidden for the current location/order mode, it won’t show even if the base product is Active. (4) Reload the POS app — it caches the menu and may not show changes immediately.
How does barcode scanning work?
How does barcode scanning work?
Add one or more barcodes to a product in the Barcode field on the Details tab. When staff scan the barcode on a connected scanner, the product is automatically added to the current ticket. You can add multiple barcodes per product (e.g. to cover different packaging sizes of the same item).
Can I create product variants (e.g. Small / Medium / Large as separate products)?
Can I create product variants (e.g. Small / Medium / Large as separate products)?
The recommended approach is to use Modifiers — create a Size modifier group with Small, Medium, and Large options, each with a price adjustment, and attach it to the product. This keeps your product list clean and groups variants together on the POS. Alternatively, you can create separate products for each variant and link them in the Variants tab.
Can I import products in bulk instead of adding them one by one?
Can I import products in bulk instead of adding them one by one?
Yes. Use the Import button on the Products page to upload a CSV file. See Import History to review the result of any import. If your account has the Retail module enabled, the template automatically includes extra optional columns (UOM, reorder level, batch/expiry tracking, and more) so a product’s stock settings can be imported on the same row — see Importing Retail Data.
Related
Bulk Pricing
Quickly override prices for multiple products in one context
Categories
Organise products into menu sections
Modifiers
Add size, add-on, and customisation options
Tax
Assign tax rates to products
Stock Profile
Full field reference for the Stock tab
Retail Overview
What the Retail module adds to Products