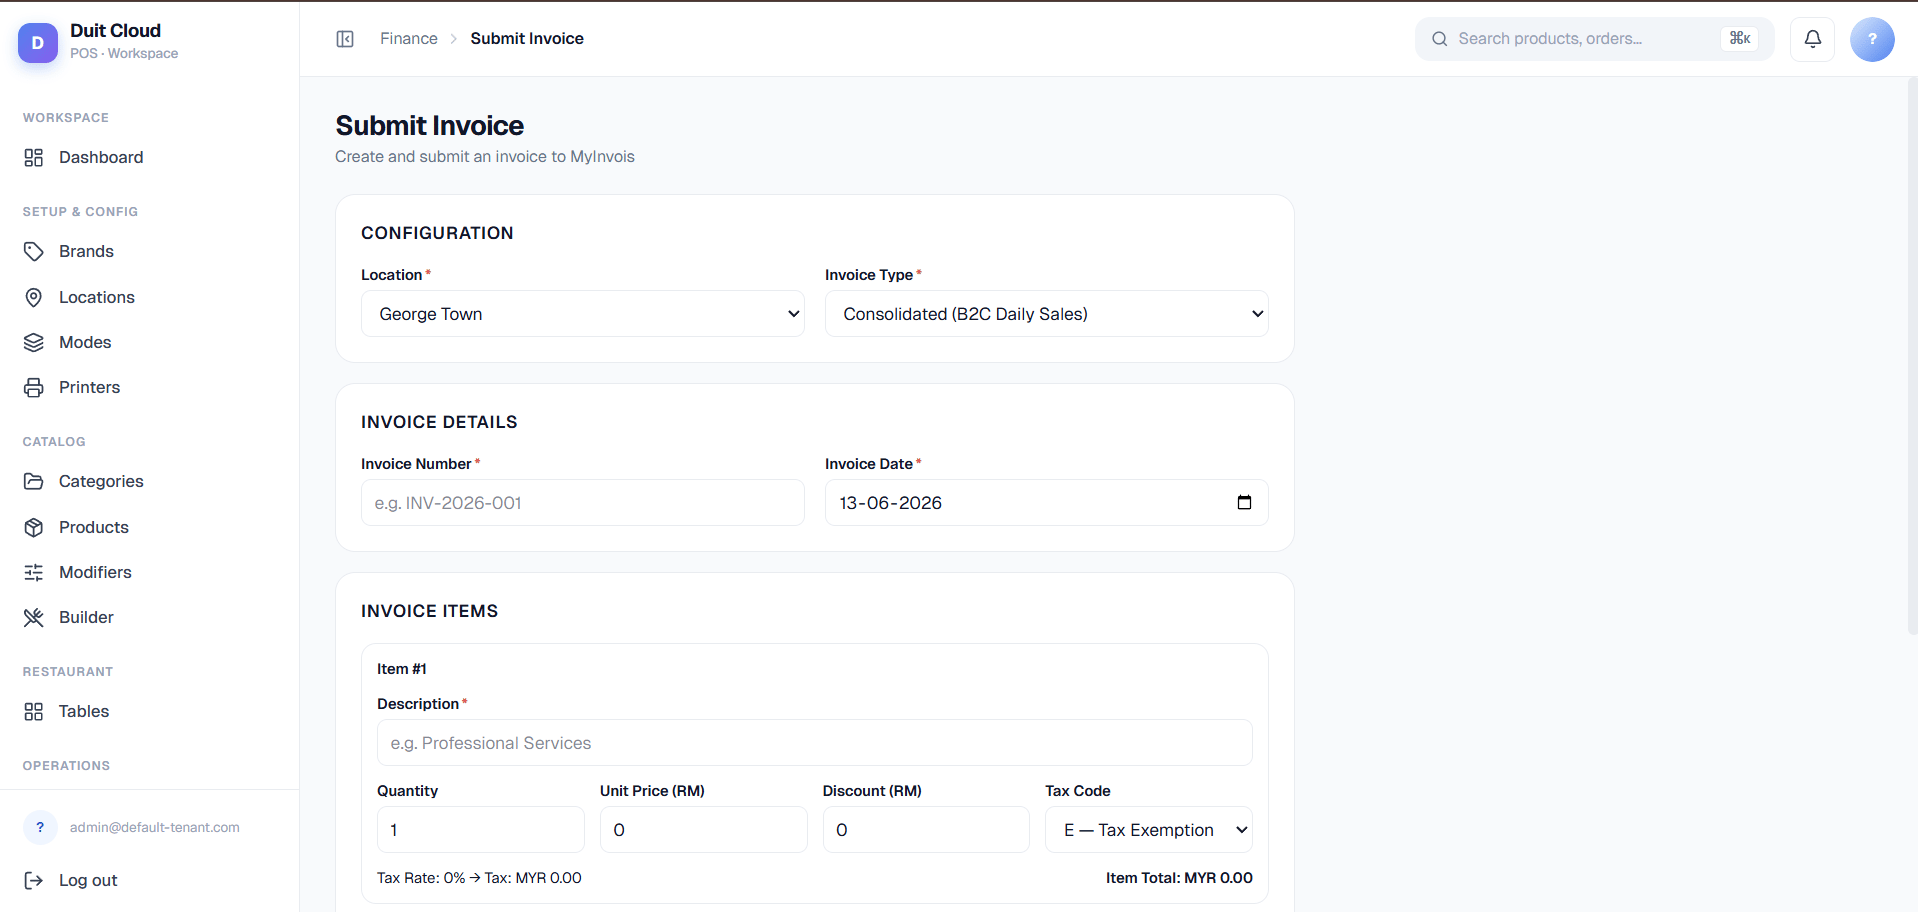
Configuration
Invoice Type has three options:
Invoice Details
Buyer Information
Invoice Items
Add one row per line item. Each row has:
Quantity, Unit Price, Discount, and Tax Code combine to compute a live Item Total shown under each row — you don’t calculate tax by hand. Use Add Item to add another row, or the trash icon to remove one (at least one row is required).
Tax codes
Summary
Create a Manual Invoice
1
Go to Submit Invoice
Open Submit Invoice from the E-Invoicing section, or click the Submit Invoice button on a location’s Invoices tab to arrive here pre-filled with that location.
2
Choose the Location and Invoice Type
Pick the branch this invoice belongs to, then choose Consolidated, Buyer, or Personal based on who it’s for.
3
Fill in Invoice Details and Buyer Information
Enter the invoice number and date. If you picked Buyer or Personal, fill in the buyer’s name, ID, and contact details — TIN is required for Buyer only.
4
Add line items
Add each item with its quantity, unit price, discount, and tax code. Check the live item totals as you go.
5
Adjust rounding if needed, then Create Draft
Review the Summary totals, add a rounding adjustment if your cash total needs one, and click Create Draft.
6
Go submit it
Head to E-Invoices, find the new Draft, and click Submit to LHDN — the form above only creates the draft, it doesn’t send it.
Frequently Asked Questions
I filled out the form and clicked Create Draft — why doesn't it show as Submitted?
I filled out the form and clicked Create Draft — why doesn't it show as Submitted?
Because it isn’t submitted yet. Creating the form only produces a Draft e-invoice, identical in status to one auto-generated from a POS ticket. You still need to open it from the E-Invoices list and click Submit to LHDN.
Which Invoice Type should I use?
Which Invoice Type should I use?
Use Buyer (B2B) for a business customer who has their own TIN and needs a proper company invoice. Use Personal (B2C) for an individual who wants an invoice in their own name but has no business TIN. Use Consolidated when you’re manually bundling several small anonymous sales into one invoice instead of issuing them one by one.
What Tax Code should I pick for a line item?
What Tax Code should I pick for a line item?
Match it to how that item is actually taxed at your location — check your Tax setup for the rates you’re registered for. Code E (0%, exempt) is a safe default for items with no applicable tax; picking the wrong code will produce an incorrect tax total on the invoice.
Can I edit an invoice after creating it here?
Can I edit an invoice after creating it here?
Not from this form — once a draft exists, changes happen from the document’s detail view on E-Invoices. If you made a mistake before submitting, it’s usually easiest to purge the incorrect draft (from the location’s Invoices tab) and create a new one here.
Related
E-Invoices
Full document list, statuses, and submission lifecycle
Locations
Configure TIN, BRN, MSIC, and address per location
LHDN Intermediary Setup
Platform-level credentials and signing certificate (root admin)
Tax
Configure the tax rates behind each Tax Code